How to Verify Blogger Website in Bing Webmaster Tool (2025)
If you have a Blogger website and want to improve its visibility on Bing, you need to verify it in Bing Webmaster Tools. Verification allows Bing to crawl, index, and rank your website, which can help increase organic traffic. This guide will walk you through the entire process of adding and verifying your Blogger website step by step in simple language.
What is Bing Webmaster Tool?
Bing Webmaster Tools is a free service by Microsoft that helps website owners monitor their site’s performance on Bing search engine. It provides insights into search rankings, crawling issues, and search queries that bring traffic to your site.
Benefits of Using Bing Webmaster Tools
- Allows Bing to crawl and index your website faster.
- Helps track your website’s search performance.
- Provides keyword insights and backlink reports.
- Helps identify and fix SEO issues.
Step-by-Step Guide to Verify Your Blogger Website in Bing Webmaster Tool
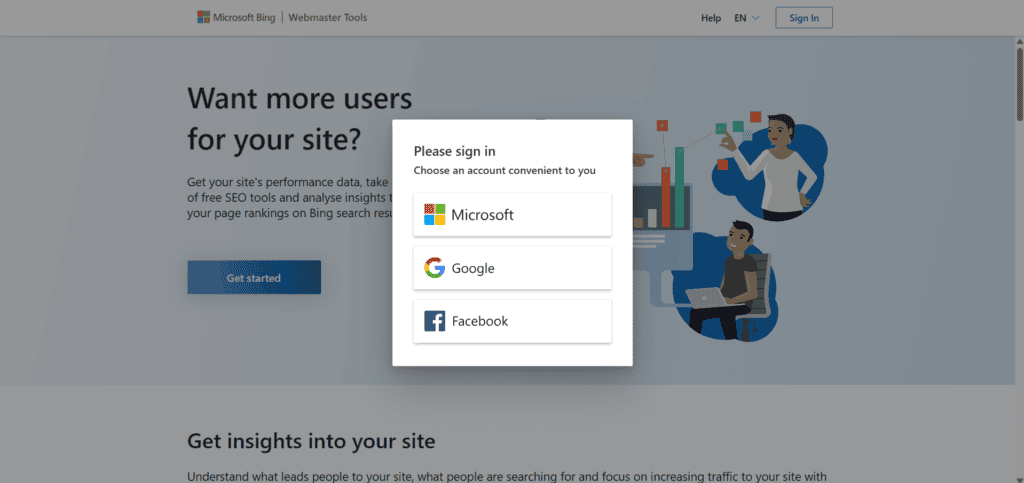
Step 1: Sign in to Bing Webmaster Tools
- Go to Bing Webmaster Tools.
- Click on Sign In.
- You can log in using a Microsoft, Google, or Facebook account. If you don’t have one, create a new account.
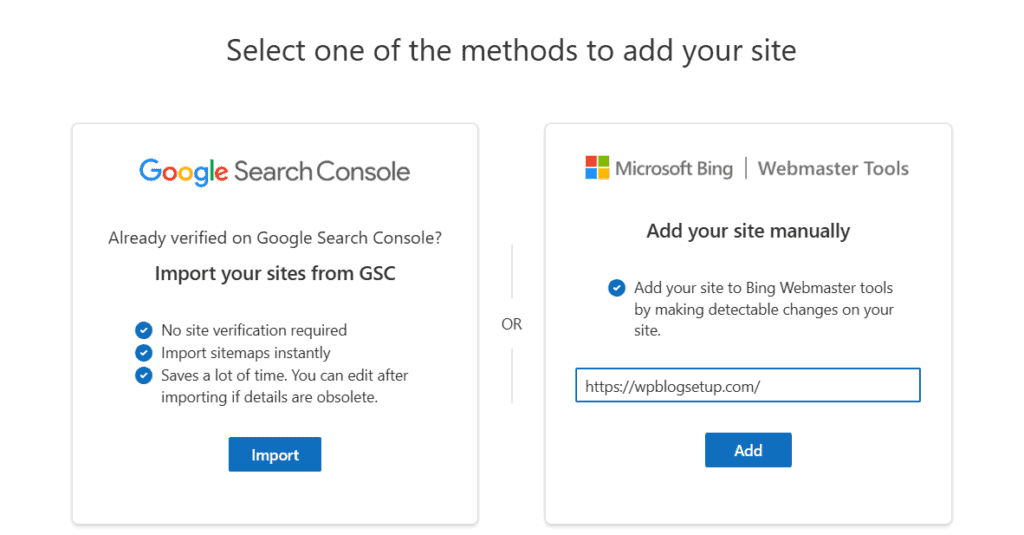
Step 2: Add Your Blogger Website to Bing
- After logging in, click on Add a Site.
- Enter your Blogger website URL (e.g., https://yourblog.blogspot.com).
- Click Add.
Step 3: Verify Ownership of Your Blogger Site
Bing provides multiple verification methods. Since Blogger doesn’t allow direct file uploads, we will use the HTML tag method.
Using the HTML Meta Tag Method
- After adding your site, Bing will display a meta tag (something like <meta name=”msvalidate.01″ content=”XXXXXXXX”/>).
- Copy this meta tag.
- Now, open a new tab and go to Blogger Dashboard.
- Click on Theme > Edit HTML.
- In the HTML editor, find the <head> section.
- Paste the copied meta tag right after <head>.
- Click Save theme.
- Go back to Bing Webmaster Tools and click Verify.
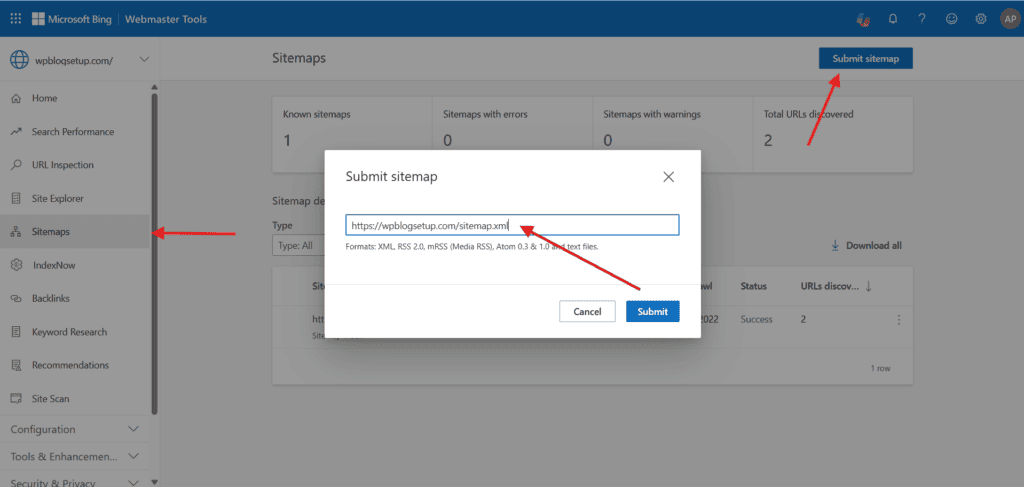
Step 4: Submitting Your Sitemap to Bing
After verification, you need to submit your Blogger Sitemap to help Bing index your site faster.
- Open Bing Webmaster Tools.
- Click on your verified site.
- Go to Sitemaps > Submit Sitemap.
- Enter the following sitemap URL:
- Click Submit.
https://yourblog.blogspot.com/sitemap.xmlNote: Replace the URL with your Website Homepage URL along with /sitemap.xml
Step 5: Monitor Your Website Performance
Once your Blogger site is verified, Bing Webmaster Tools will start showing data like:
- Search performance
- Indexed pages
- Click-through rates
- Crawl errors
- Backlinks
- Keywords
Common Issues and Troubleshooting
1. Bing Verification Fails
- Make sure the meta tag is correctly placed inside
<head>. - Wait for a few minutes and try clicking Verify again.
- If the issue persists, clear your Blogger site cache and retry.
2. Bing Is Not Indexing My Blogger Website
Ensure your Blogger site is public (Go to Settings > Privacy > Visible to Search Engines: Yes).
Check robots.txt settings (Settings > Crawlers and Indexing > Enable Custom robots.txt).
Regularly update content and use proper SEO techniques.
3. Sitemap Submission Failed
- Ensure your Blogger URL is correct.
- Try submitting /atom.xml or /feeds/posts/default?orderby=updated as alternative sitemaps.
Conclusion
Verifying your Blogger website in Bing Webmaster Tools is crucial for better indexing and ranking on Bing Search Engine. By following the steps outlined in this guide, you can successfully verify your site, submit a sitemap, and monitor performance.
Start optimizing your Blogger site today and take advantage of Bing’s traffic potential!