How To Hide A Featured Image On An Individual Post In WordPress
Today we are going to talk about how to hide a featured image on an individual post in WordPress. Hiding your featured image can be necessary if you need to reuse the same featured image on multiple posts and don’t want it to be visible on some of those posts or for any other reason you can think of.
This tutorial will show you how to remove the featured image from displaying on individual posts in WordPress when you aren’t using the same featured image on all of your posts. Let’s get started!…
What is the WordPress Featured Image?
The featured image is an important part of a post in WordPress. It’s displayed as a thumbnail on your site, and if you have an image gallery, it’s also used to represent that gallery. The featured image should be saved in .jpg or .png format, but not more than 1024px wide or high. As a best practice, we advise not using full-size images for posts because they can slow down your site by taking up too much space on each page load.
The Benefit of Using WordPress Featured Image
WordPress Featured Image is a very powerful tool. When used properly, WordPress Featured Image can be a very useful tool for your website. Here are some of its major benefits. It helps you make your content more attractive and engaging to visitors who visit your site. The featured image provides a visual introduction of your overall content.
It also helps in Getting search traffic as it will show as a featured snippet in search or in the dedicated Image search self.
Steps to Hide a Featured Image in a WordPress Post?
To hide the featured image in any individual blog post, follow the below steps.
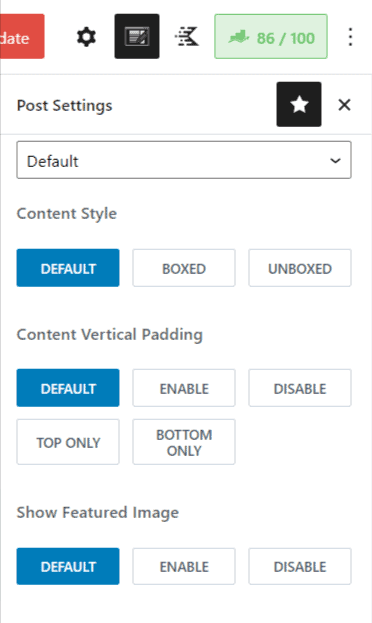
Login to the Wordpress dashboard and open the edit mode of that Blog post.
In the case of the Kadence theme, you can do it easily by clicking on the theme option as shown in the below image and just disabling the “Show Featured Image” option.
How to hide featured images in WordPress using CSS?
If you are using any other theme then you can use a custom CSS code to hide the featured images in any individual blog post.
For this go to Appearance > Customize > Additional CSS.
Now paste the below CSS code on it and replace the Post Id in the code.
.post-12345 .post-image {
display: none;
}
You need to replace 1234 with your actual post ID.
If you want to hide the featured image for All blog posts then you can use the below CSS code.
.entry-content img {
display: none;
}
Hide featured image using a Plugin
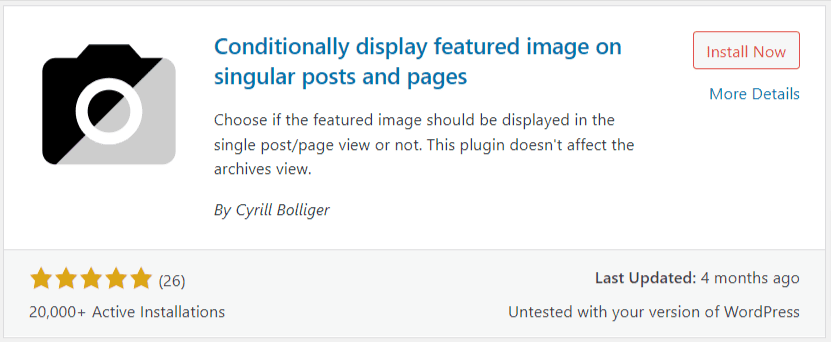
If you don’t want to code then you can use a dedicated plugin called “Conditionally display featured image on singular posts and pages“.
You can also directly install this plugin by searching it in plugins > Add New.
After that, you will see an option to disable the featured image from a single post right within the Post Editor. You will see this option below the default Wordpress featured image section.
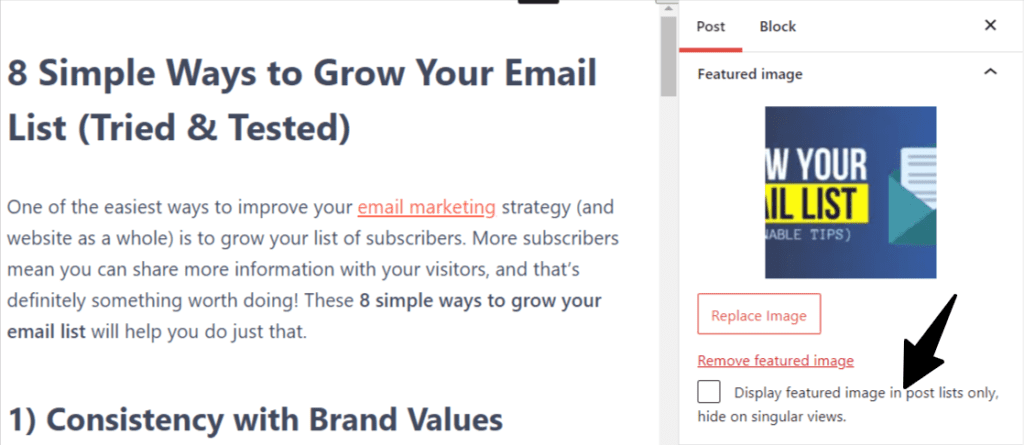
This is the easiest way to hide a featured image in Wordpress from an individual blog post.
There are several other similar plugins that you can try.
Can I use multiple featured images for my blog or post?
By default Wordpress only allows us to use a single featured image per blog post. We can’t use multiple featured images in the same Blog post.
But, you can use the Dynamic Featured Image plugin to insert multiple featured images for your blog post. You can easily set the number of featured images that you want to insert in a single blog post. You don’t need any coding for that.
Conclusion
I hope this blog post helps you hide the featured image from an individual blog post on Wordpress. If you have any doubts regarding this you can ask me in the comment section.
Which among the method are you going to try, let us know in this comment section.
Read Also: 7 Must-Have WordPress plugins for beginners


