How to Add Custom Robots.txt in Blogger? (2023)

If you’re a blogger using Blogger, customizing your robots.txt file can greatly affect how visible your website is on search engines and improve your SEO performance.
By adjusting the robots.txt directives to match what you want, you can control which parts of your Blogger site search engines can access and include in their search results.
In this blog post, we will provide you with a comprehensive guide on adding a custom robots.txt file to your Blogger website.
What is a Robots.txt file?
The robots.txt file uses a simple syntax to communicate with search engine crawlers. It consists of directives that specify rules for search engines to follow when crawling your website. Each directive is composed of two parts: the user-agent and the action.
Key directives and their functions:
- User-agent directive: This directive specifies which search engine crawler the rule applies to. It allows you to provide instructions for specific crawlers or all crawlers.
- Disallow directive: With the disallow directive, you can instruct search engines not to crawl and index specific parts of your website.
- Allow directive: The allow directive is used to override any disallow rules and allows search engines to crawl and index specific content that would otherwise be blocked.
- Sitemap directive: The sitemap directive specifies the location of your website’s XML sitemap, which helps search engines discover and understand the structure of your site.
By understanding the basics of robots.txt syntax and the functions of key directives, bloggers can gain insight into how to effectively control search engine crawling and indexing on their websites.
How to Generate Robots.txt file for Blogger website?
To generate the Robots.txt file for your Blogger website, follow the below steps:
Open the homepage of your website and copy the Full Website URL.
Now Go to the Online Robots.txt Generator for Blogger and enter your copied URL.
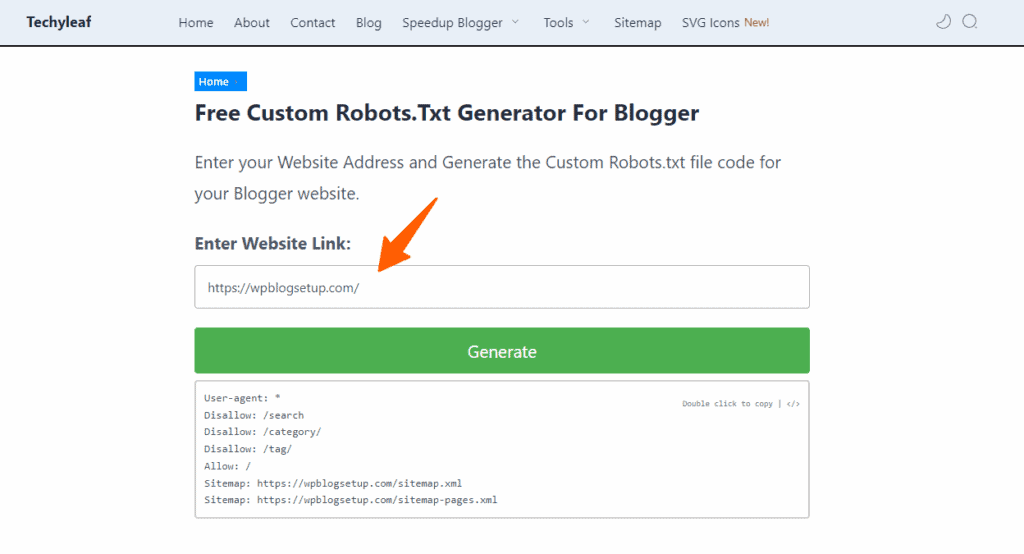
Now click on the Generate button and this tool will generate the Robots.txt content for you.
Just copy the generated code by Double-clicking on it and login to your Blogger dashboard.
Go to the settings and scroll down below to see the option Enable Custom Robots.txt.
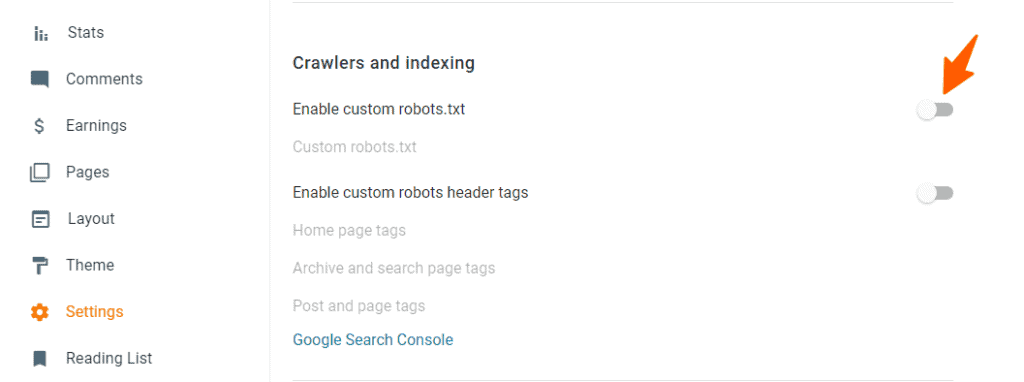
After enabling this option, click on the below option, paste the generated code, and save it.

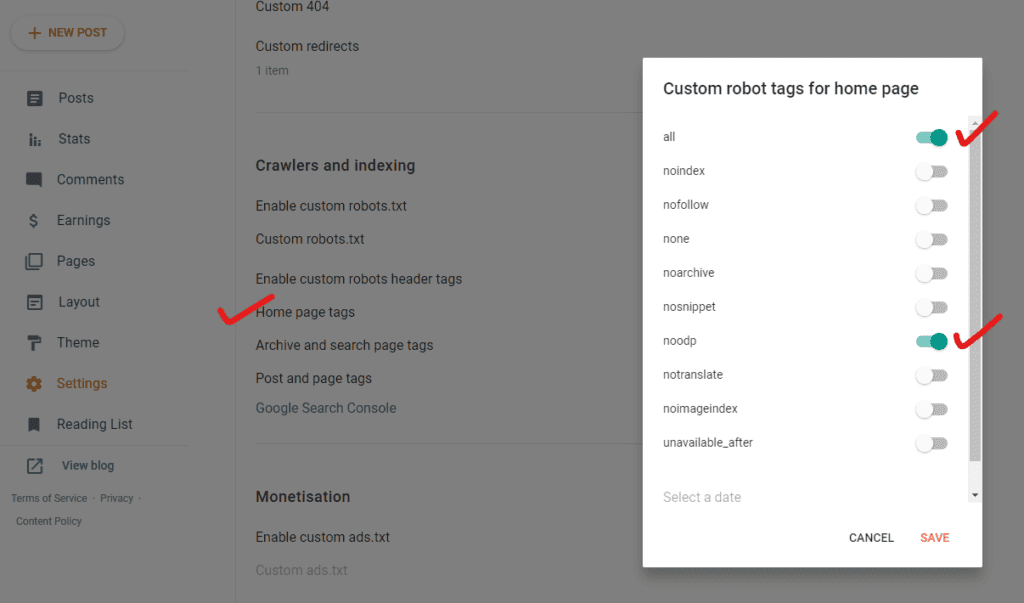
Now you can also enable custom robots header tags for more controls. Here for the homepage click on the ALL and nodp option.
Similarly, if you want to block the indexing of the Archive and search page tags you can select the noindex and nodp options.
You can also learn more about this in detail by following this video.
One of the most common mistakes when creating a custom robots.txt file is making syntax errors. Even a small typo or misplaced character can render the entire file ineffective.
After writing the custom robots.txt code, it’s essential to verify its correctness. You can use online robots.txt testing tools or the Google Search Console’s robots.txt tester to check for any syntax errors or potential issues.
You can also verify if the code is properly added to the website or not by entering the URL in this format.
https://wpblogsetup.com/robots.txt (Homepage URL/robots.txt)
Conclusion
Customizing the robots.txt file in Blogger is crucial for making your website more search engine-friendly. By adjusting the rules to fit your needs, you can decide which parts of your site search engines can see and include in their search results.
This control helps improve your website’s visibility, prevent the inclusion of unnecessary or duplicate content, and prioritize the indexing of your most important pages.
If you still have doubts, do let me know in the comment section.
Read Also: How to add FAQ schema to Blogger website?