How to Transfer Domain From GoDaddy to Hostinger (The Easy Way)

In this article, we’ll provide a simplified step-by-step guide on how to transfer domain from GoDaddy to Hostinger. We’ll also cover important considerations for a successful domain transfer.
So. let’s start.
Step 1: Point Your Domain to Hostinger Nameservers
Before starting the transfer, make sure to point your domain to Hostinger’s nameservers to maintain uninterrupted services like emails. Here’s how:
Log in to Your GoDaddy Account: Go to GoDaddy and log in to your account.
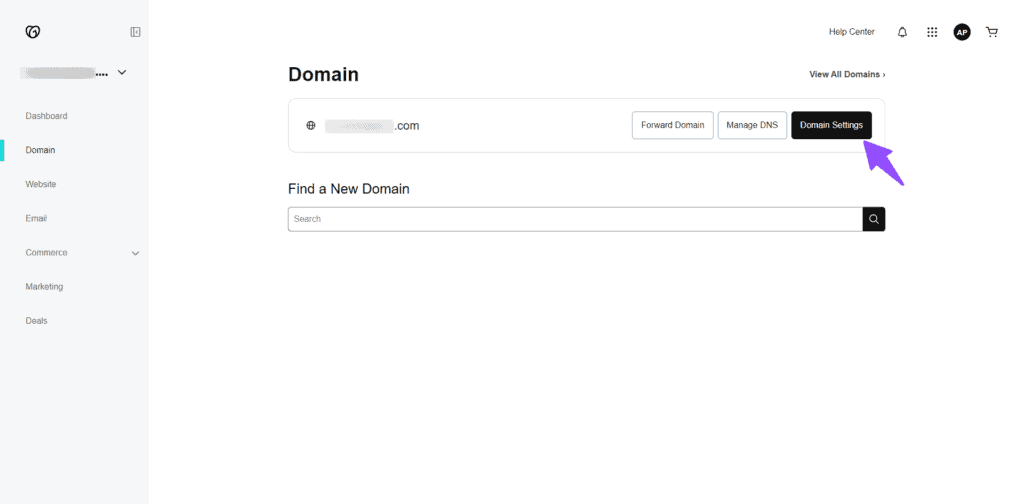
Access Domain Management: Navigate to the “Domains” section, select the domain name you want to transfer and click “Manage.”
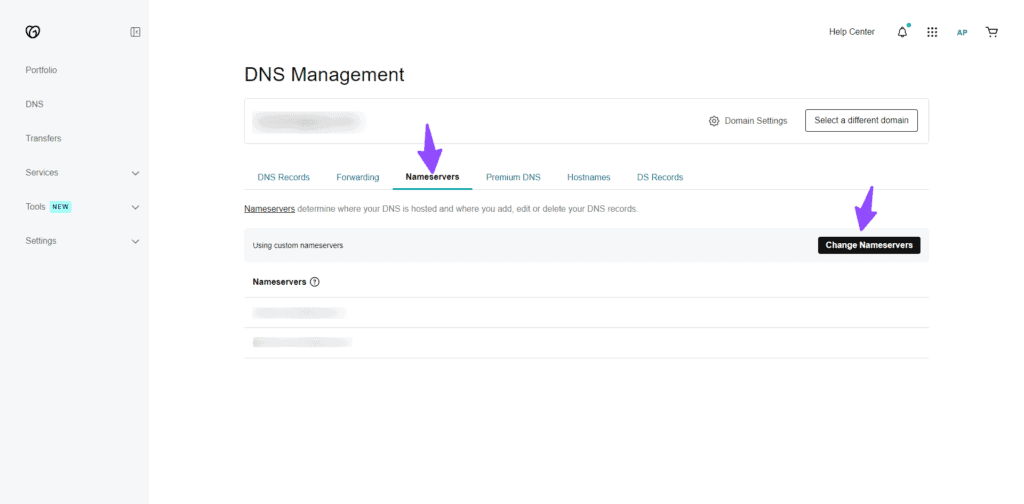
Manage DNS Settings Now you will see the option Nameservers as shown in the below screenshot.
Change Nameservers In the “Nameservers” section, click the “Change Nameserver” button.
Configure Nameservers Now you will need to select the 2nd option “I’ll use my own nameservers“.
Input Hostinger’s Nameservers Enter the name server addresses you copied from Hostinger. Usually, these are something like
- ns1.dns-parking.com
- ns2.dns-parking.com
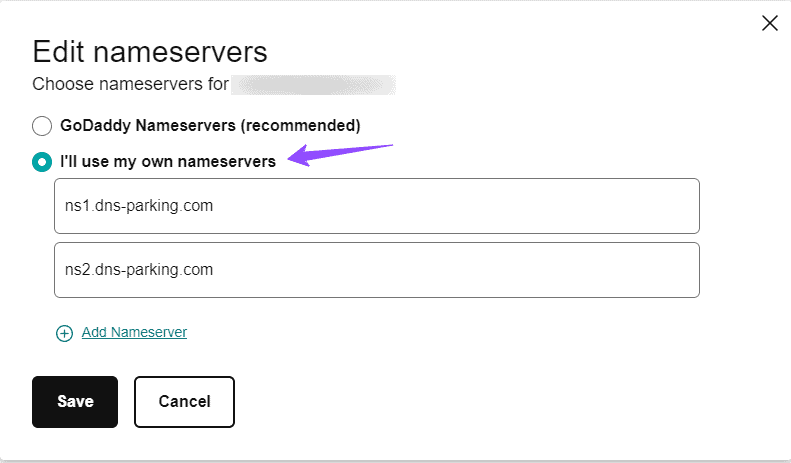
Afterward, save the changes.
Your DNS settings should fully update within the next 24 hours. Once this happens, the domain transfer will be complete, and your domain will be ready for use with Hostinger.
Step 2: Unlock Your Domain at GoDaddy
GoDaddy typically locks domains by default for security. To transfer, you need to unlock it:
Sign in to your GoDaddy Domain Portfolio.
Select your domain and go to the Transfer Option.
Now you need to turn this domain lock option to OFF.
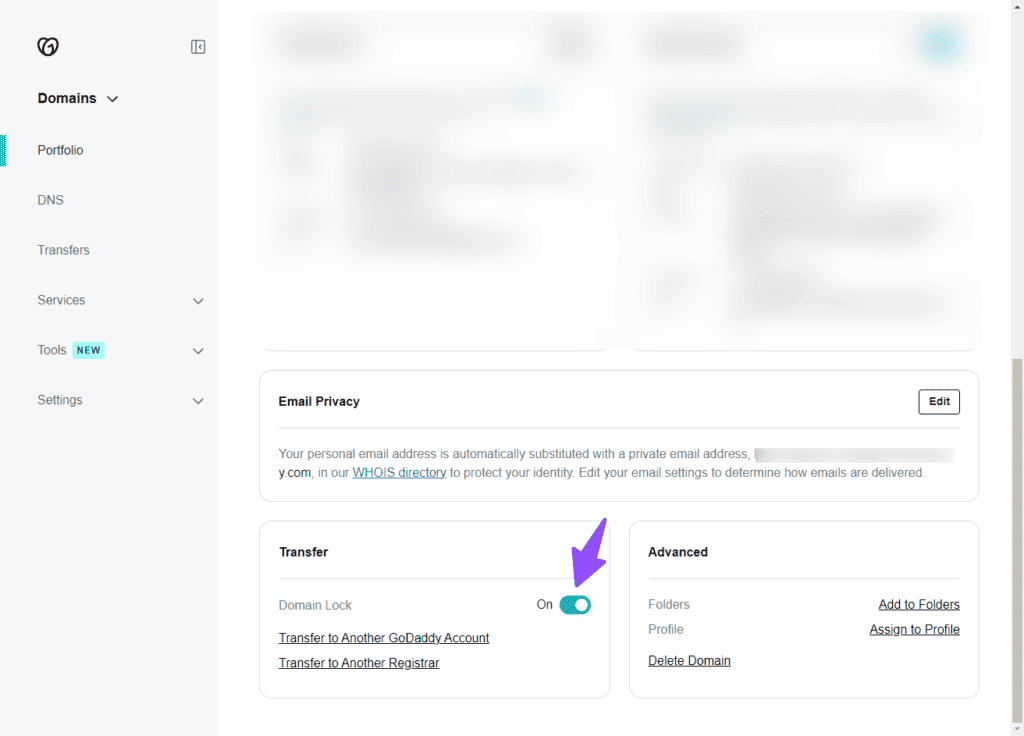
Review and confirm the changes.
Step 3: Get the Authorization Code
Hostinger will require an authorization code (Auth code) for the transfer. Here’s how to get it:
Here, you will see an option just below the domain lock like “Transfer to Another Registrar“. Click on here and you need to proceed as shown in the below image.
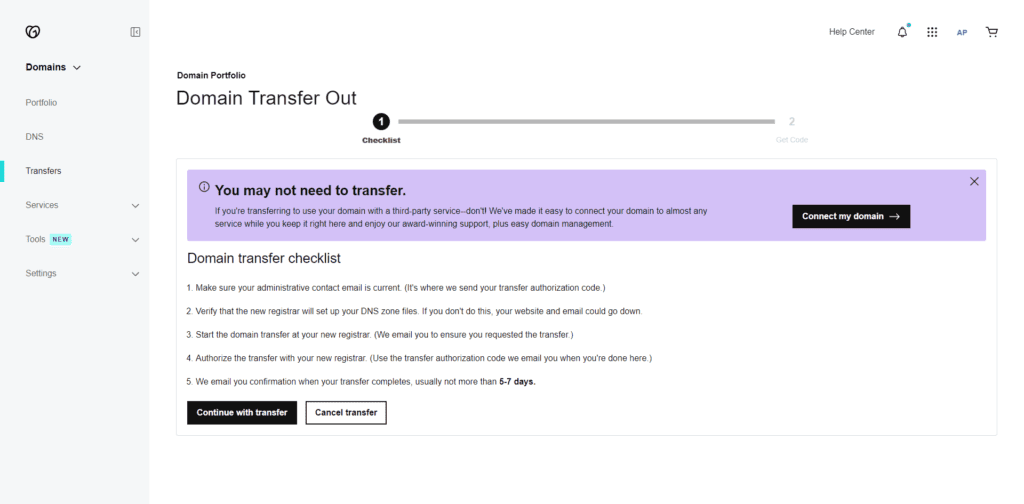
Follow the transfer checklist or insert the IPS tag if you’re transferring a .uk domain. Continue with the transfer and get your EPP code.
Step 4: Initiate the Domain Transfer at Hostinger
Once you have the code, purchase the transfer service on hostinger’s website:
Visit Hostinger’s Domain Transfer page.
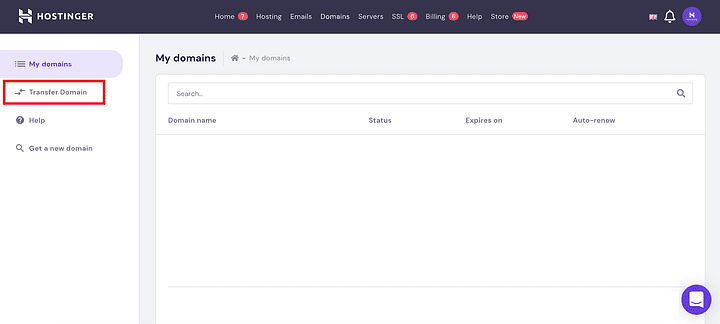
Enter your domain name and choose the transfer period.
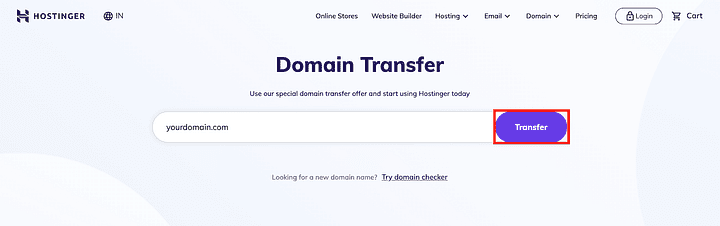
Create or log in to your Hostinger account, select a payment method, and complete the payment.
Enter the EPP code and opt to use Hostinger nameservers.
Confirm the transfer via email.
The transfer process takes around 5-7 days.
Factors to Consider for a Successful Transfer
- Ownership Confirmation: Make sure that your contact information, like your name, email, and phone number, is correct. This is needed for your current domain provider to send you an email confirming the transfer.
- Domain Age and Activity: Some domains need to be active for at least 60 days before you can switch them to a different provider. This rule, set by ICANN, applies to domains like .com, .net, and others, to protect against unauthorized transfers. Different rules might apply to country-specific domains.
- Previous Transfers: If you’ve already transferred your domain recently, you may have to wait 60 days before transferring it again. This rule, followed by all registrars, helps prevent unauthorized people from taking your domain.
- Get the Secret Code: Your current domain provider will give you a secret code called an EPP or Auth-Code. You’ll need this code to confirm your identity when transferring the domain to the new provider. You should get this code from GoDaddy and provide it to Hostinger.
Checking these factors will help ensure a smooth and secure domain transfer.
You can also follow this video Tutorial.
Conclusion
Transferring your domain from GoDaddy to Hostinger is a straightforward process involving four main steps.
By following these steps and considering the prerequisites, you can transfer the domain from Godaddy to Hostinger. If you have any questions or suggestions, feel free to share them in the comments section below.
Read Also: Best Shared Hosting Providers for WordPress